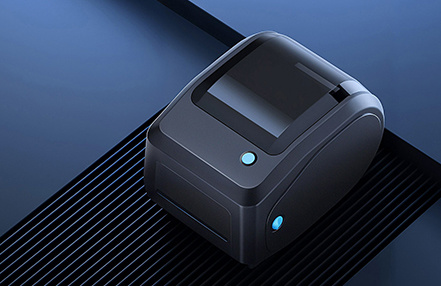
GG-AT 20EW Frequently Asked Questions

Daily maintenance of the printer
1. Cleaning the exterior and paper tray of the printer: Please gently wipe the surface of the printer and the inside of the paper tray with a damp cloth that has been wrung out completely. Make sure the cloth is completely dry.
2. Cleaning the printhead: The printhead must be cleaned regularly, especially when print quality deteriorates. The cleaning method is as follows: Gently wipe the printhead part of the printhead with a cotton swab dipped in anhydrous alcohol.


GG-AT 10EW Frequently Asked Questions

Daily maintenance of the printer
1. Cleaning the exterior and paper tray of the printer: Please gently wipe the surface of the printer and the inside of the paper tray with a damp cloth that has been wrung out completely. Make sure the cloth is completely dry.
2. Cleaning the printhead: The printhead must be cleaned regularly, especially when print quality deteriorates. The cleaning method is as follows: Gently wipe the printhead part of the printhead with a cotton swab dipped in anhydrous alcohol.


GG-AT 110HW Frequently Asked Questions

The paper won't cut. The glue from the label may be sticking to the blade. Clean the blade.


GG-AT 50EW Frequently Asked Questions

Light display
1. Blue light on, 0-30% battery power
2. Blue light on, 30-60%
3. Blue light on, 60-100%
Paper jam alert: The buzzer beeps three times, and the three indicator lights flash continuously


B90 Frequently Asked Questions and Solutions

Poor print quality
1. Remove the label tape from the machine.
2. Check if there is any label tape stuck in the machine.
3. If so, remove it. You can use tweezers or a small paperclip to help clear the jam.
4. Check if the two discs are correctly aligned. On the discs, at the horizontal position of the cutter, you will find two arrows or a wide plastic block; these two arrows or the wide plastic block should be aligned with each other.
5. If not, align the two discs correctly. Hold the upper wheel of the device and turn the lower wheel until the cutter center of the upper wheel is aligned with the wide plastic block of the lower wheel. A clicking sound should be heard when the rollers are correctly aligned.
6. Press the printing device 3 times without inserting the tape.
7. Reinsert the label tape.
8. Perform a test print.


Print head movement is obstructed, stopping with a long beep or vibrating in place

Reason: Because the print head guide rail becomes dry after prolonged sliding, the print head movement will be hindered, and to a certain extent, it will cause the printing to stop. If not handled in time, it may seriously burn out the drive circuit.
Solution: Apply a few drops of instrument oil to the print guide rail, move the print head back and forth to distribute it evenly. After restarting, if there is still a hindrance phenomenon, it may be that the drive circuit is burned out, and it needs to be sent to the repair department.


Incomplete or unclear character printing

1. Needle printer
Reasons:
①. The print ribbon has been used for too long.
②. The print head has not been cleaned for a long time, and there is too much dirt; the print head has broken needles.
③. The print head drive circuit is malfunctioning.
Solutions:
First adjust the spacing between the print head and the print roller. If the fault cannot be eliminated, replace the ribbon.
If the print head needle is broken or the drive circuit is faulty, the print needle or drive tube must be replaced.
2. Inkjet printer
Reasons:
①. The ink cartridge is empty.
②. The printer has not been used for a long time or has been exposed to direct sunlight, causing the nozzle to become clogged.
Solutions: You can replace the ink cartridge or refill the ink. If the ink cartridge is not used up, it can be determined that the nozzle is clogged.
Remove the ink cartridge (for printers where the ink cartridge nozzle is not integrated, the nozzle needs to be removed), and soak the nozzle in warm water for a while. Be sure not to immerse the circuit board part in water, otherwise the consequences will be unimaginable.


The print is clear on one side but blurry on the other.

The issue can be resolved by adjusting the distance between the print head guide and the print roller to make them parallel.


The print is faint and the characters are illegible.

If the printed documents persistently show faint ink and illegible characters, it is likely that the printer nozzle is clogged.
Access "Start" - "Settings" - "Printers and Faxes" on the computer connected to the printer. Right-click on the printer whose nozzle needs cleaning, select "Printing Preferences" - "Maintenance" to enter the printer maintenance interface. Then, click the printer cleaning button, select "Clean" - "Start", and the printer will begin cleaning the nozzle.


Printer paper turned black

If the printed document is black and inconsistent with the preview, check if the printer nozzle is damaged, if the ink tube is broken, and if the printer ink model and specifications are normal.


