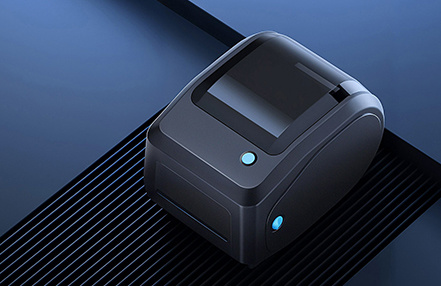
RM-GG 950W Frequently Asked Questions

Printer automatically shuts down
Battery power is exhausted. Please charge immediately.
Print is blurry
1. The printer has not been cleaned for a long time, causing the core to be contaminated with dirt. The printer core needs to be cleaned.
2. Poor printing consumables. Please set the print density and use G&G original standard consumables.


RM-GG-980 Frequently Asked Questions

No data
No print content entered.
Exceeded maximum length
The input content exceeds the specified length. Select a regular template using the (template) function key and adjust the length (using the left and right arrow keys), then press the (OK) key to confirm the setting.


GG-D1100MW Frequently Asked Questions

Print Self-Test Page
Press the power button to start printing the self-test page.
Paper Peel-off Mode
After placing the paper roll, push up the peel-off paper rack to enable paper peel-off and enter the paper peel-off function mode.


GG-AT 60P Frequently Asked Questions

Unable to print or incorrect print content
1. The printer is in HexDump mode. Restart the printer to exit Hex Dump mode.
2. Incorrect serial communication (RS-232) settings. Reconfigure the printer and computer to use the same baud rate.


GG-AH 30EW Frequently Asked Questions

Daily maintenance of the printer
1. Cleaning the exterior and paper tray of the printer: Please gently wipe the surface of the printer and the inside of the paper tray with a damp cloth that has been wrung out completely. Make sure the cloth is completely dry.
2. Cleaning the printhead: The printhead must be cleaned regularly, especially when print quality deteriorates. A cotton swab dipped in anhydrous alcohol can be used to gently wipe the printhead to clean it.


GG-AT 20EW Frequently Asked Questions

Daily maintenance of the printer
1. Cleaning the exterior and paper tray of the printer: Please gently wipe the surface of the printer and the inside of the paper tray with a damp cloth that has been wrung out completely. Make sure the cloth is completely dry.
2. Cleaning the printhead: The printhead must be cleaned regularly, especially when print quality deteriorates. The cleaning method is as follows: Gently wipe the printhead part of the printhead with a cotton swab dipped in anhydrous alcohol.


GG-AT 10EW Frequently Asked Questions

Daily maintenance of the printer
1. Cleaning the exterior and paper tray of the printer: Please gently wipe the surface of the printer and the inside of the paper tray with a damp cloth that has been wrung out completely. Make sure the cloth is completely dry.
2. Cleaning the printhead: The printhead must be cleaned regularly, especially when print quality deteriorates. The cleaning method is as follows: Gently wipe the printhead part of the printhead with a cotton swab dipped in anhydrous alcohol.


GG-AT 110HW Frequently Asked Questions

The paper won't cut. The glue from the label may be sticking to the blade. Clean the blade.


GG-AT 50EW Frequently Asked Questions

Light display
1. Blue light on, 0-30% battery power
2. Blue light on, 30-60%
3. Blue light on, 60-100%
Paper jam alert: The buzzer beeps three times, and the three indicator lights flash continuously


B90 Frequently Asked Questions and Solutions

Poor print quality
1. Remove the label tape from the machine.
2. Check if there is any label tape stuck in the machine.
3. If so, remove it. You can use tweezers or a small paperclip to help clear the jam.
4. Check if the two discs are correctly aligned. On the discs, at the horizontal position of the cutter, you will find two arrows or a wide plastic block; these two arrows or the wide plastic block should be aligned with each other.
5. If not, align the two discs correctly. Hold the upper wheel of the device and turn the lower wheel until the cutter center of the upper wheel is aligned with the wide plastic block of the lower wheel. A clicking sound should be heard when the rollers are correctly aligned.
6. Press the printing device 3 times without inserting the tape.
7. Reinsert the label tape.
8. Perform a test print.


